
Email Templates and Merge Fields
Email Templates and Merge Fields
ClayHR’s Message Template functionality streamlines communication by combining reusable templates with dynamic merge fields. This ensures every message is automatically personalized and sent with the right data—saving time while maintaining a consistent tone across your organization.
Understanding the Scope of Email Templates
ClayHR’s email templates are highly versatile and support communication across multiple areas of your HR operations. Here’s how they work in practice:
1. Stay Informed with Default Smart System Notifications
ClayHR automatically sends routine notifications and reminders—such as approvals, submissions, and status updates—throughout the platform.
Each user can manage their own notification preferences, choosing which types of routine updates they wish to receive.
2. Personalize the Experience with Customizable Default Messages
Some system-generated notifications can be customized to better reflect your organization’s tone and culture.
For example, you can personalize the messages sent for birthdays or work anniversaries to make them more engaging and employee-friendly.
Common customizable templates include:
- Birthday Notification
- PTO Approval / Rejection
- Expense Report Submission / Approval / Rejection
- Workflow Launch
- Anniversary Notification
- Performance Review Assignment Notification
- Pending Review Assignment Notification
- Offer Letter
- Feedback Creation Reminder Notification
- Default Candidate Reference
- Candidate Application Acknowledgement
- Other
3. Create Powerful Custom Templates for Any Scenario
Beyond the defaults, you can design new templates from scratch and use them in any HR communication scenario.
Some common examples include:
- Candidate interview invitations or reminders
- Rejection or next-step notifications
- Onboarding welcome messages for future joiners
- Internal announcements (policy updates, training invitations)
- Performance review reminders
- Workflow-related updates or task assignments
- Employee recognition or appreciation messages
4. Reach the Right Audience Every Time
Email templates can be sent to existing employees, future joiners, or candidates, depending on the workflow or communication purpose.
Creating Email Templates
Follow these steps to create a new email template:
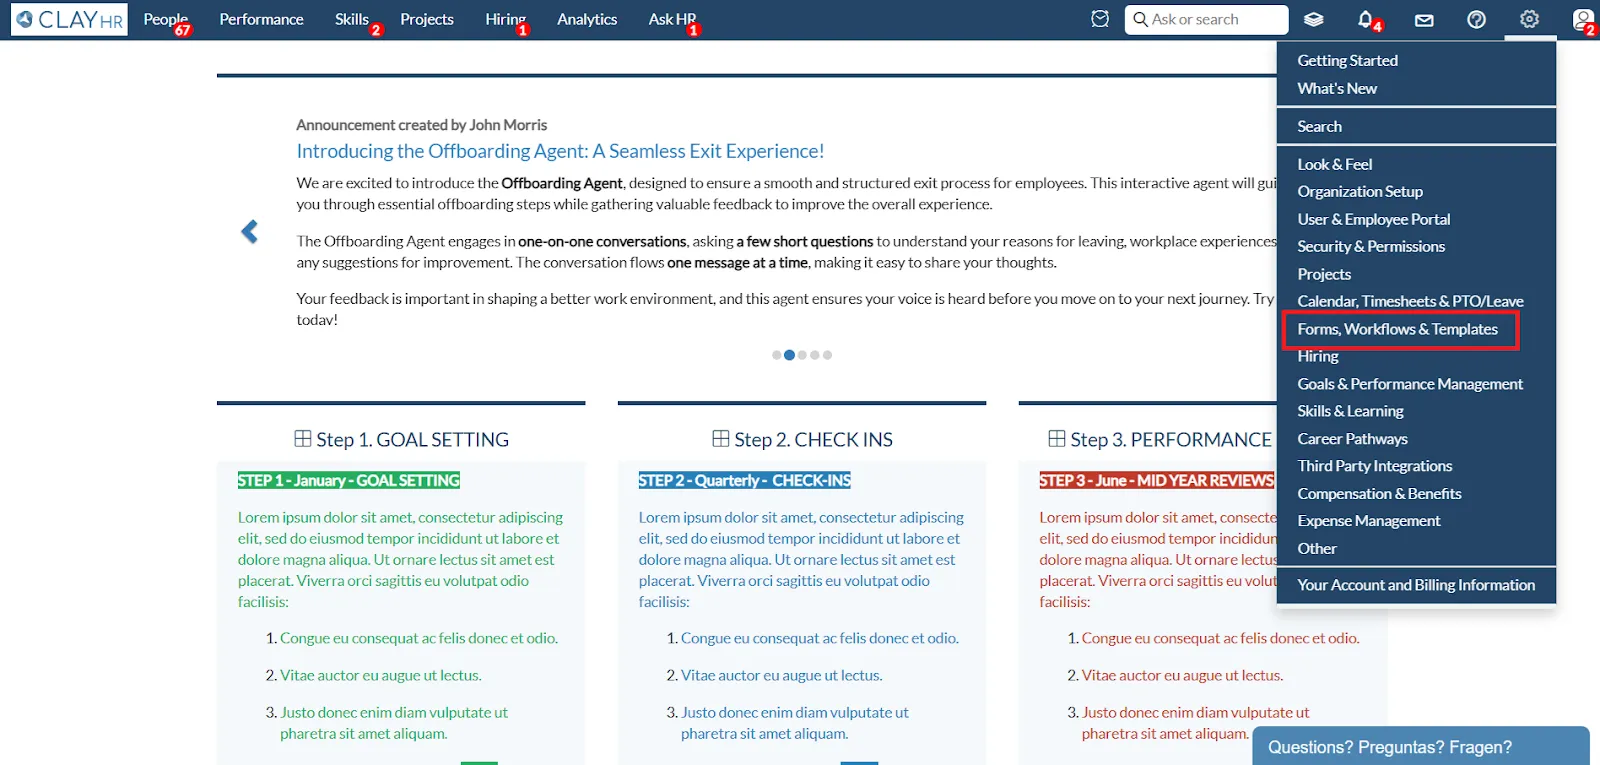
- Go to the Setup menu (top right corner).
- Scroll down and select Forms, Workflows & Templates.
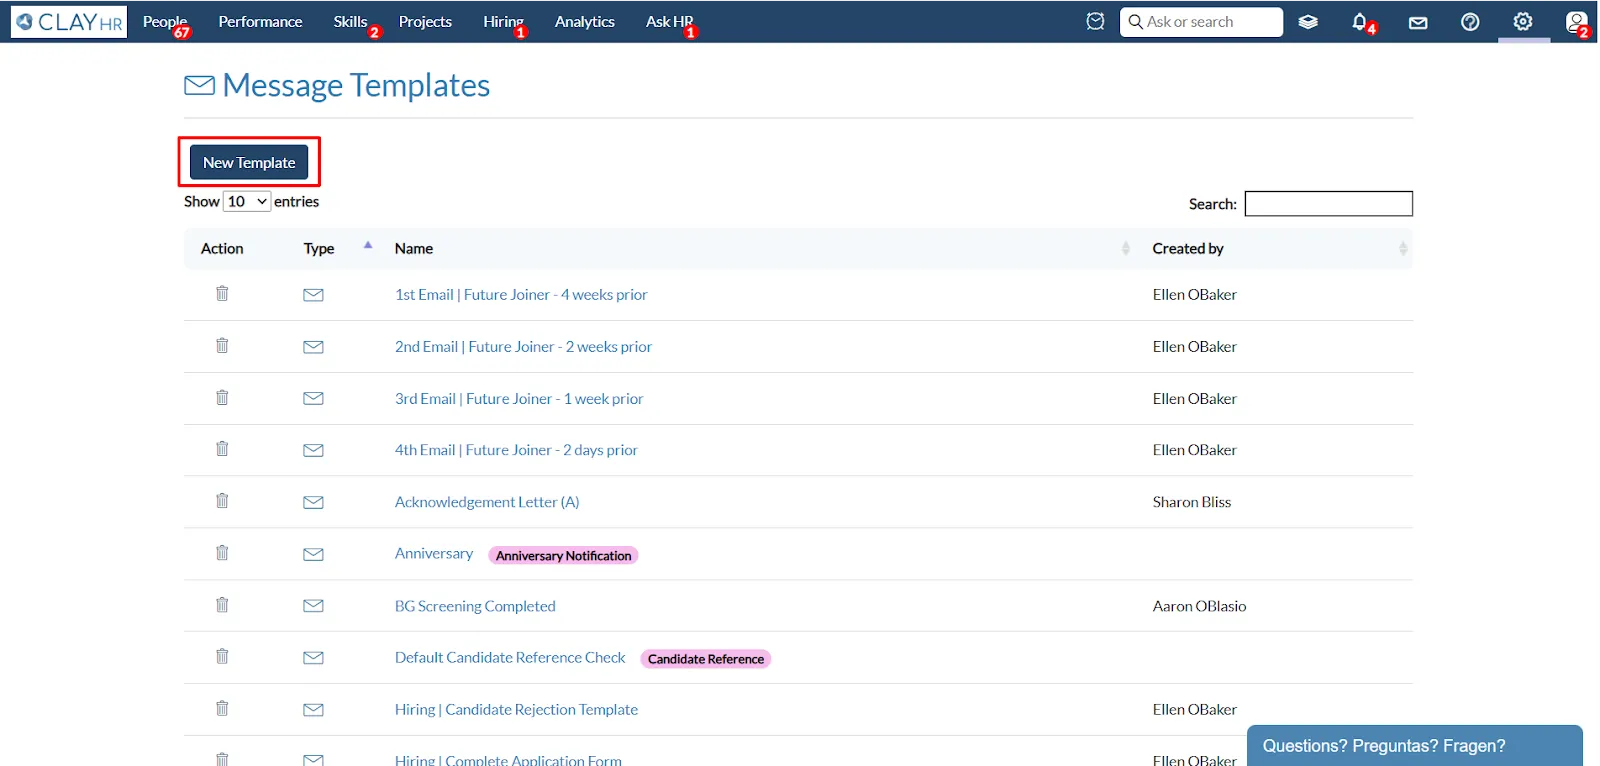
- Click on Message Templates.
- Select New Template.
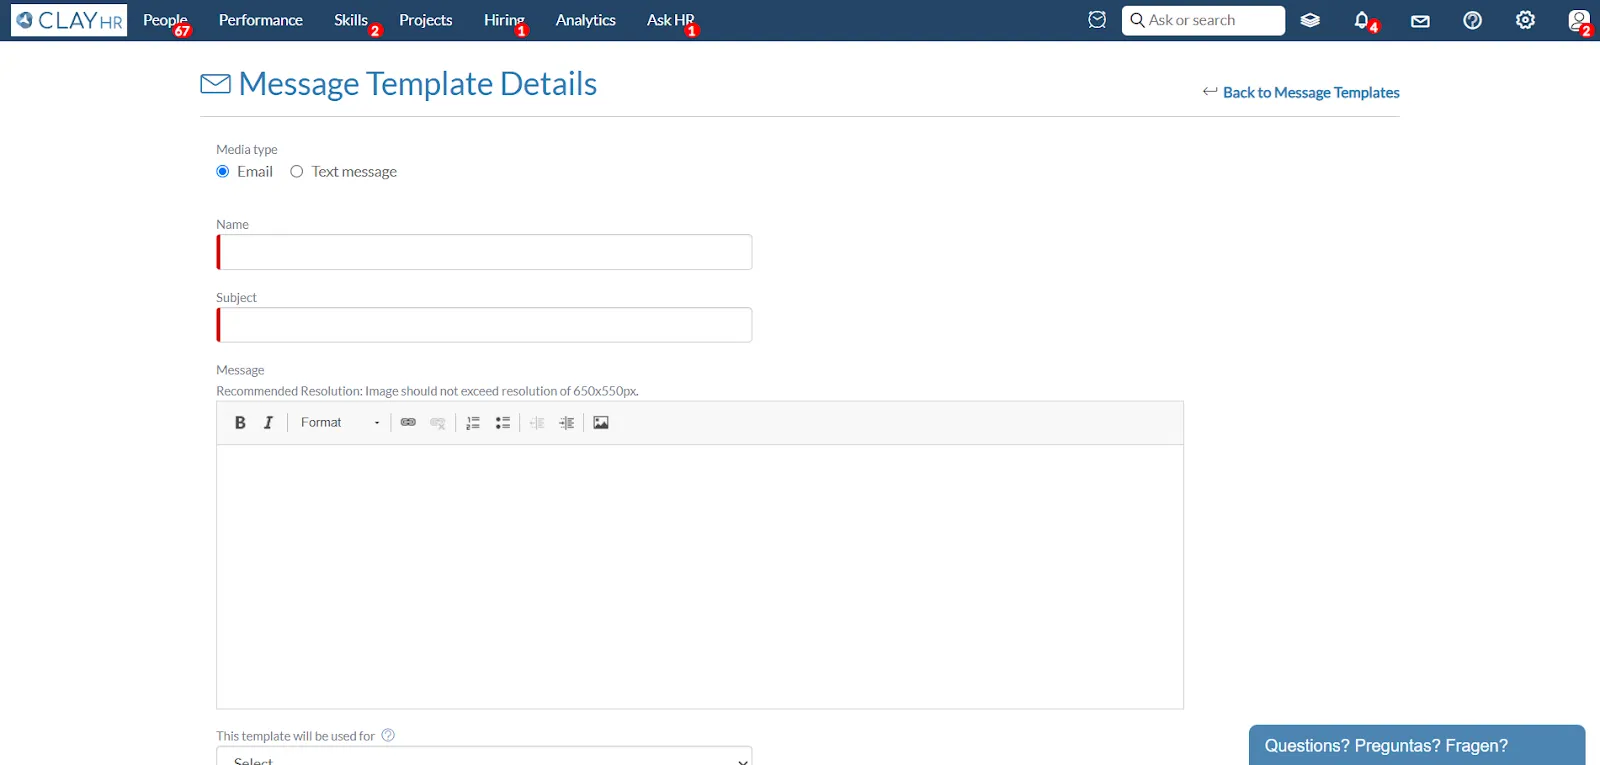
- Design your message template — include subject, body text, and merge fields as needed.
- Click Save.
Your new template will now be available for use across ClayHR communications.
Personalizing Messages with Merge Fields
ClayHR makes it easy to send messages that feel personal—without the manual effort.
With merge fields (also called supported variables), you can automatically pull real-time data—like names, positions, or dates—straight from the system into your email templates. When the message is sent, ClayHR instantly replaces each merge field with the correct value for that recipient.
1. Explore Ready-to-Use Variables
Each template category comes with its own set of supported variables, so you can easily include details that matter most for that message type.
To see what’s available, simply open the Supported Variables drop-down when creating or editing a template.
For example, in a candidate-related template, you might see fields such as:
{{CandidateFullName}}{{PositionTitle}}{{InterviewDate}}
These placeholders automatically become real data when the message goes out—saving you time while ensuring every message feels tailored and professional.
2. Go Further with Custom Fields
Want to include details unique to your organization? You can reference any custom field you’ve created within ClayHR using this format:
{{CF_customfieldcode}}
Example:
If you’ve added a custom field labeled ESP, you can use it in your message like this:
{{CF_ESP}}
When the message is sent, ClayHR will replace it with the actual value from that field for each recipient—no extra steps required.
By combining standard variables and custom fields, you can craft messages that are not only consistent and accurate but also truly personalized to every candidate or employee interaction.
Steps to Create Email Templates
- Go to the top right "Setup" Menu.
- Scroll down and click on the "Forms, Workflows & Templates" link.
- Click on the “Message Templates” link.

- Click on the “New Template”.
- Design your template and save it.


.webp)
