US I-9 - Employment Eligibility Verification
I-9 form, also known as the Employment Eligibility Verification form, is a mandatory document used by employers in the United States to verify the identity and legal authorization of their employees to work. Completing and storing these forms correctly is critical for compliance with U.S. Citizenship and Immigration Services (USCIS) regulations.
ClayHR offers a streamlined solution by digitizing the I-9 form process through its Global Form Library. In ClayHR, you can easily import the I-9 form directly into your system, assign it to new employees, and keep a secure, organized record of all submissions. With bulk assignments and automated reminders, ClayHR ensures that your I-9 forms are filled out accurately and stored securely, reducing the administrative burden and helping you stay compliant effortlessly.
How to Import I-9 Web form?
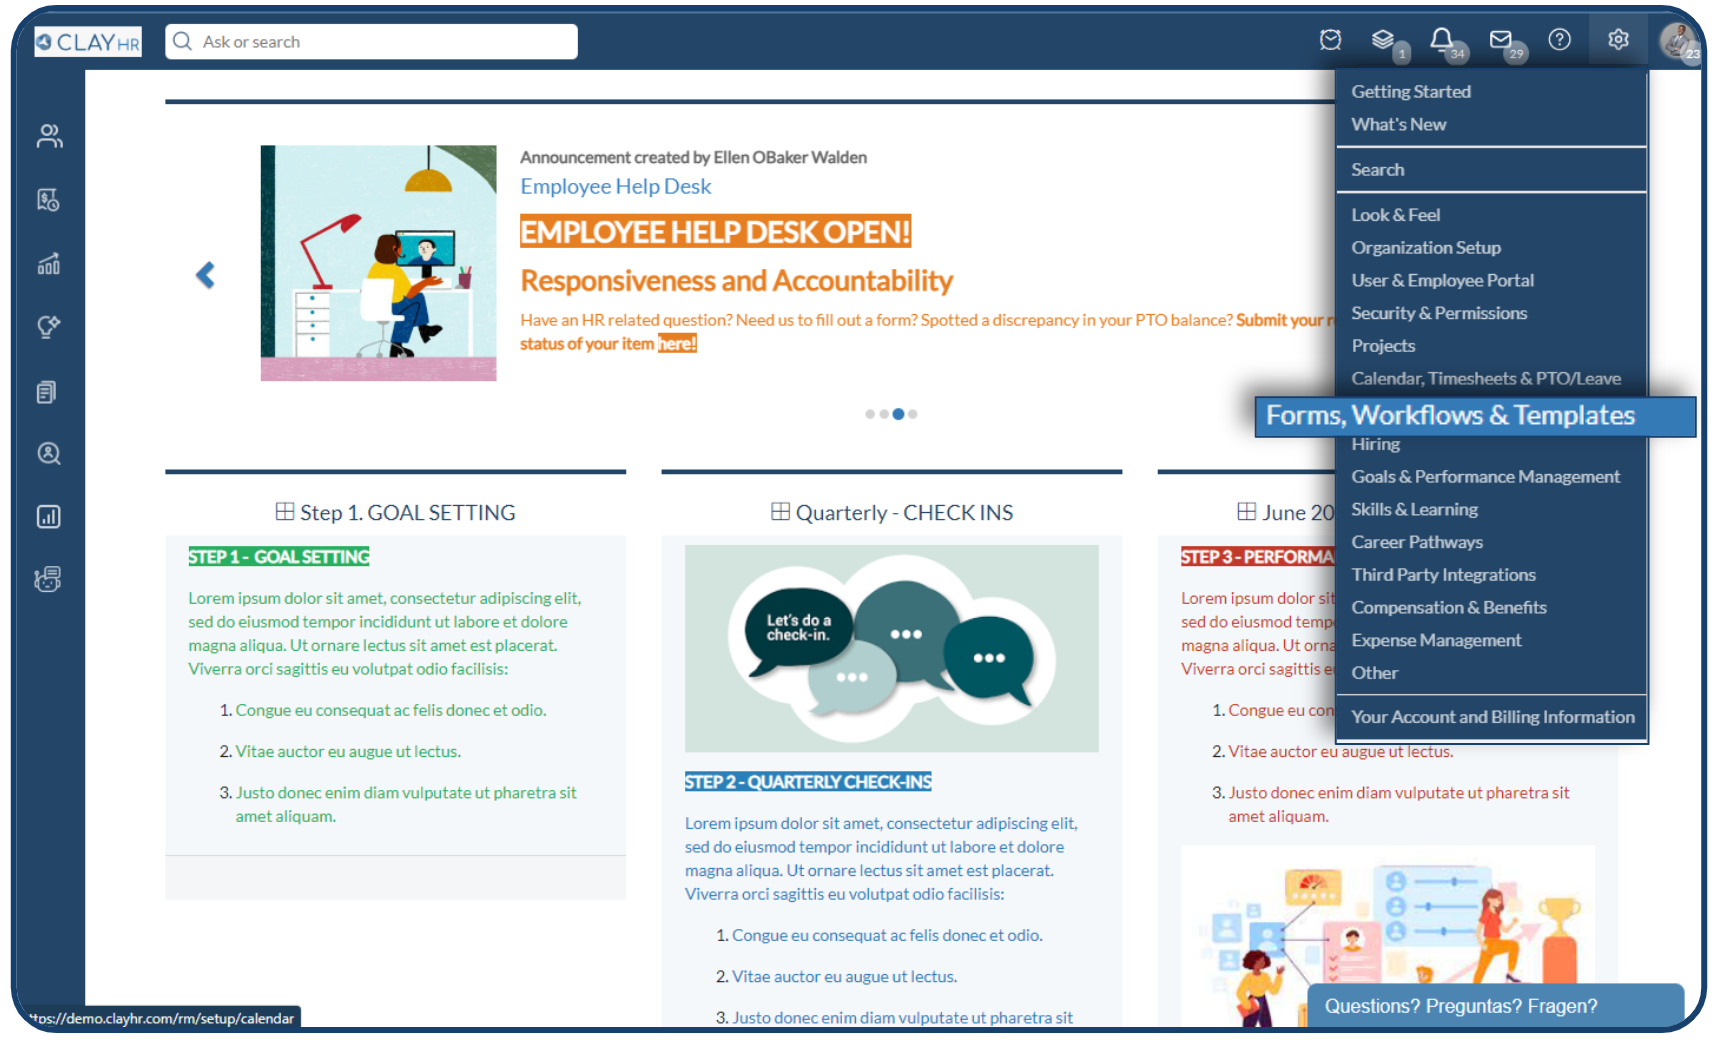
- Click on the Gear/Settings icon in the top right corner and select Forms, Workflows, and Templates.

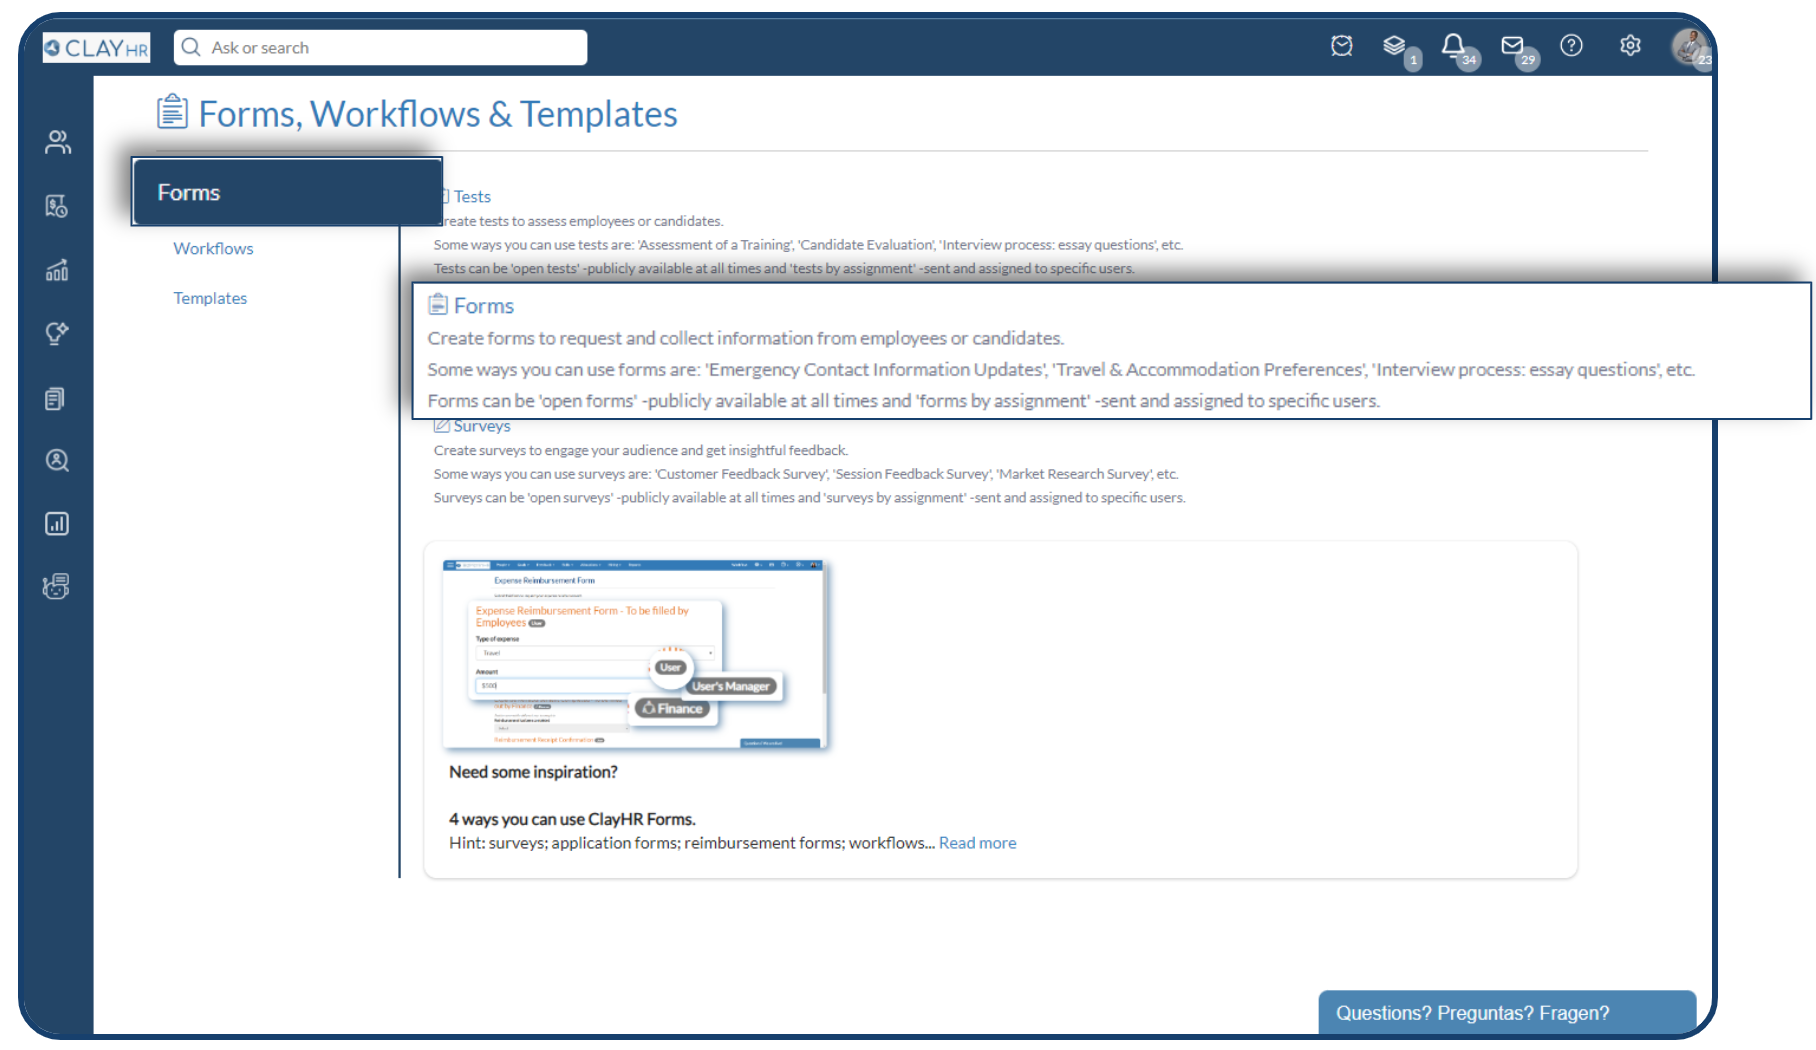
- Navigate to the Forms section and Click on “Forms”.

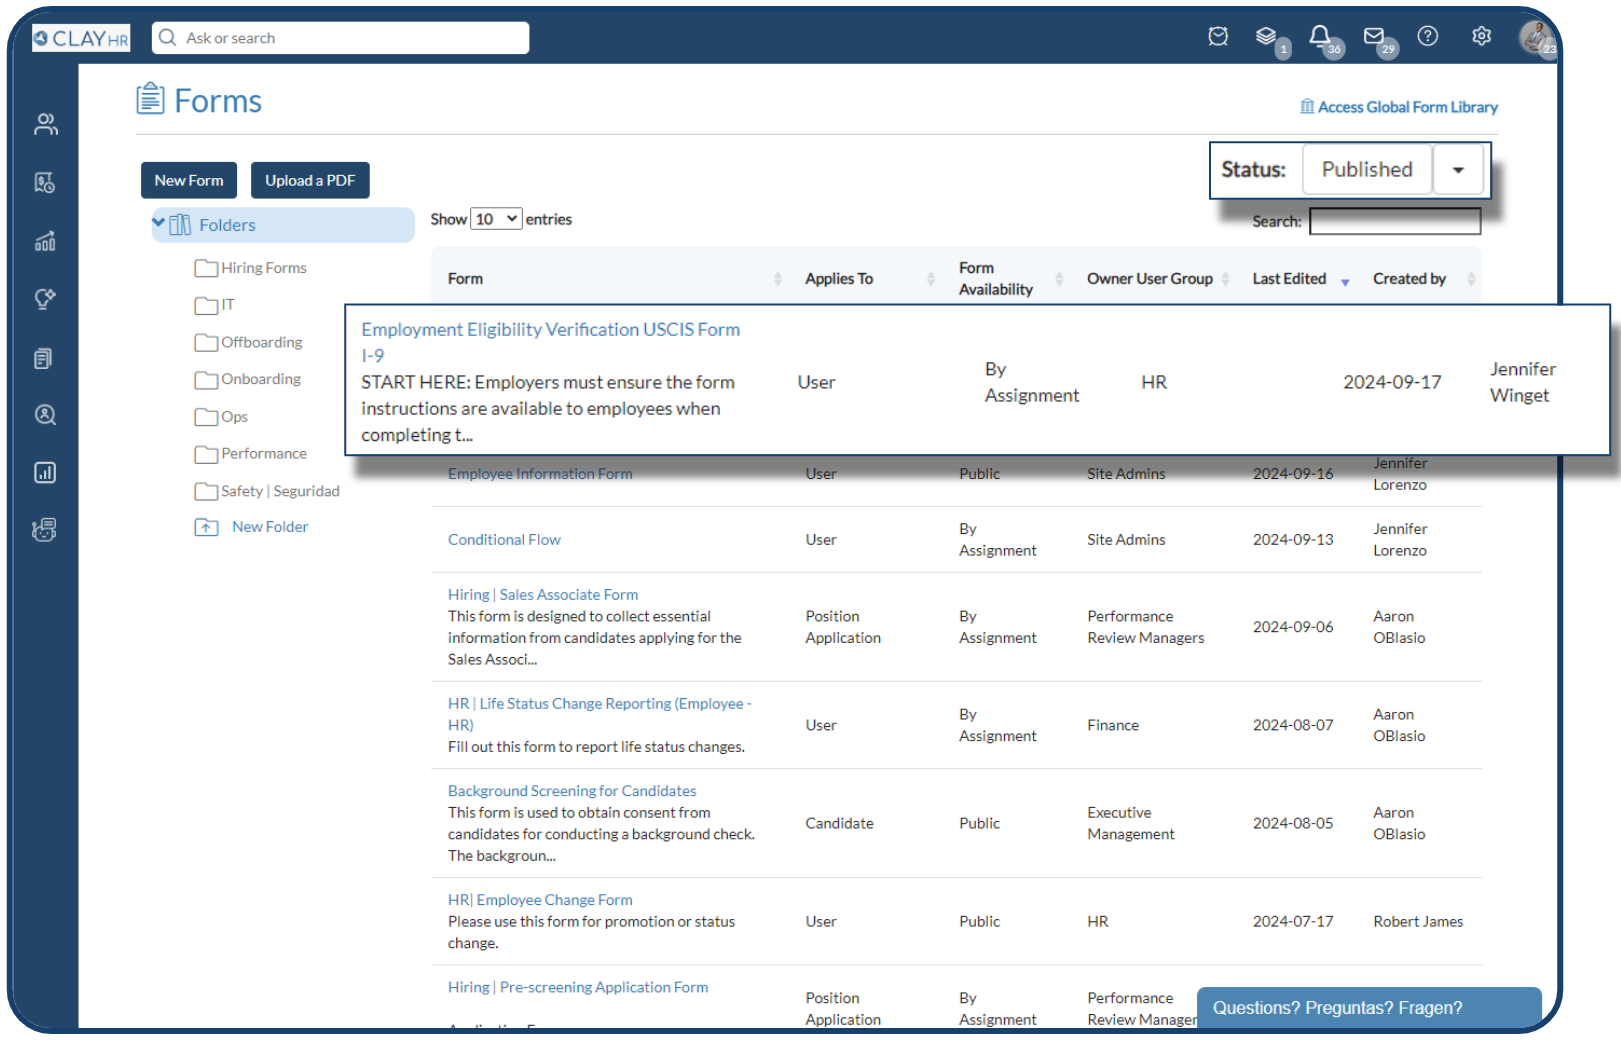
- On the Forms homepage, click “Access Global Form Library” in the top right corner.

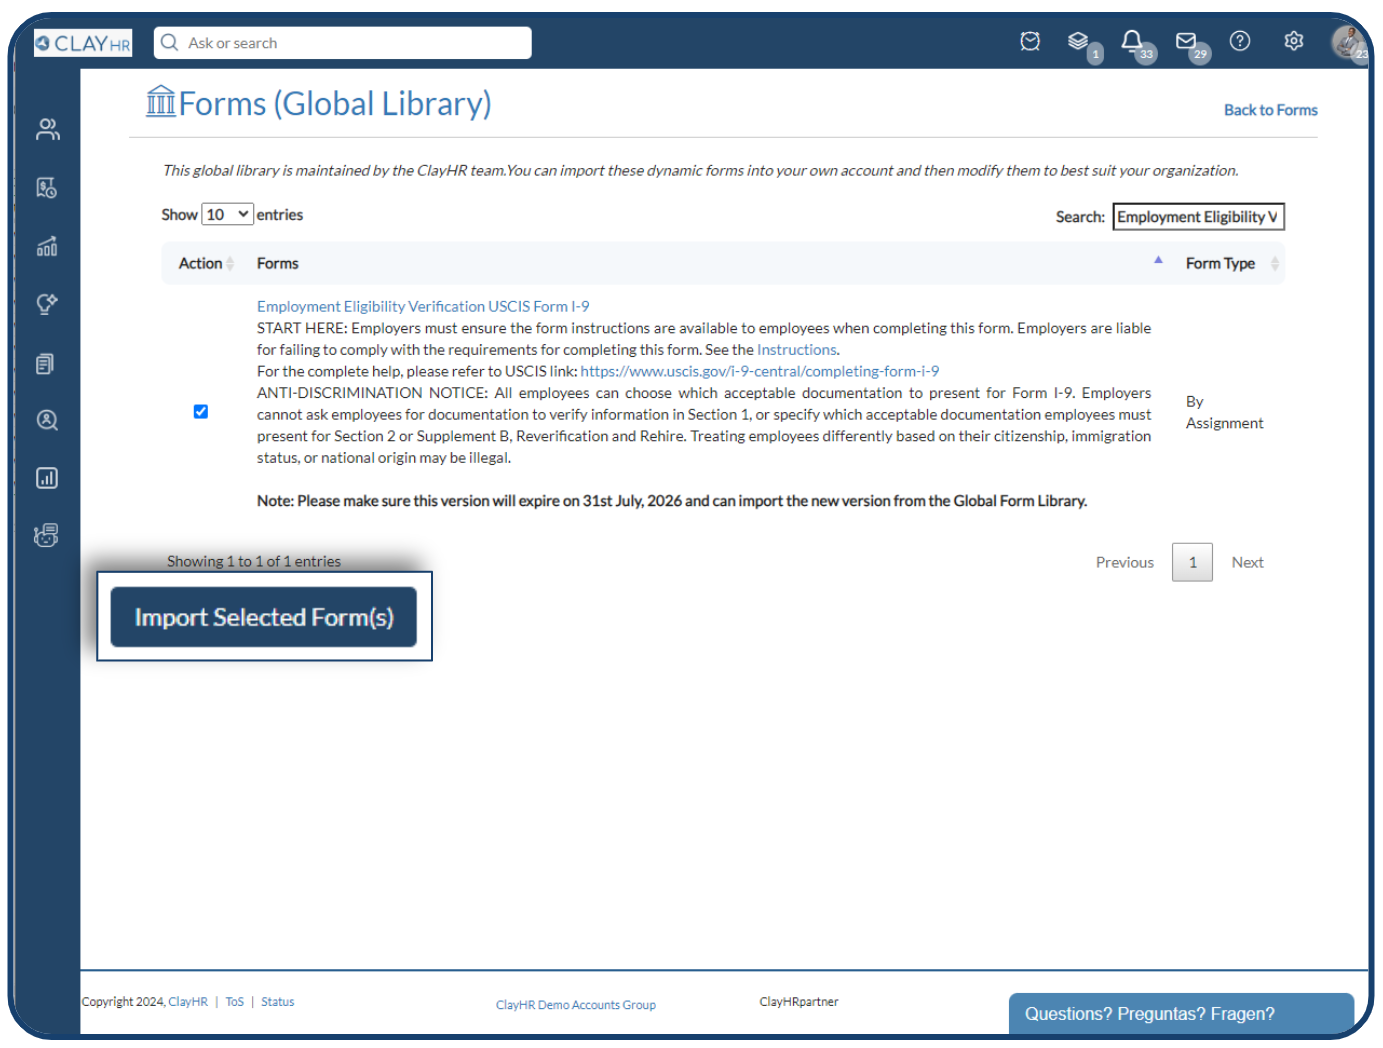
- Locate the “Employment Eligibility Verification USCIS Form I-9” and click Import Selected Form.

- The imported form will now appear on the Forms homepage under the “Published” status.

- Modify Section 2 and add the user group for your HR or onboarding user group as needed.
.png)
Your form is ready to use.
Points to remember, once I-9 form is imported:
- After the changes done in the form, please contact your account manager to have the form locked, ensuring that no further edits can be made.
- Also, Supplement A, Preparer and/or Translator Certification for Section 1 and Supplement B, Reverification and Rehire (formerly Section 3) is also available as respective forms in ClayHR that can be imported following the same steps as above.
How to Assign I-9 form?
You can assign I-9 form directly to the new-hire or add it as a workflow step in your onboarding workflow.
Assign as regular ClayHR forms
Assign the form to the new hire directly through ClayHR forms and track their progress on the 'Forms Response Page.' Additionally, uploaded documents within the form will be visible on the 'Forms Response View' page.
- Go to I-9 form > Click on Assignments & Responses > Click on User’s Status. Forms Response View page will appear.
.png)
Easily Assign through Workflows
We can assign I-9 form through workflows, which allow users to fill the form and upload their selected document from List A or both List B and C by adding these two steps to the process.
- Add a new step in your existing onboarding workflow and select 'Complete a form/test/survey' under the 'What does this step involve' section.
.png)
- Add a new step, select 'Uploading a document' under the 'What does this step involve' section to allow users to upload their chosen documents from the specified lists.
.png)
- Uploaded documents will appear in the “Users Docs Tab” under Users profile section.
To learn more about how to import I-9 web form, watch the video:


