Setting up sender’s name in email notifications
Set your organization name as the email sender for ClayHR email notifications
To set up the sender's name proceed with the following steps:
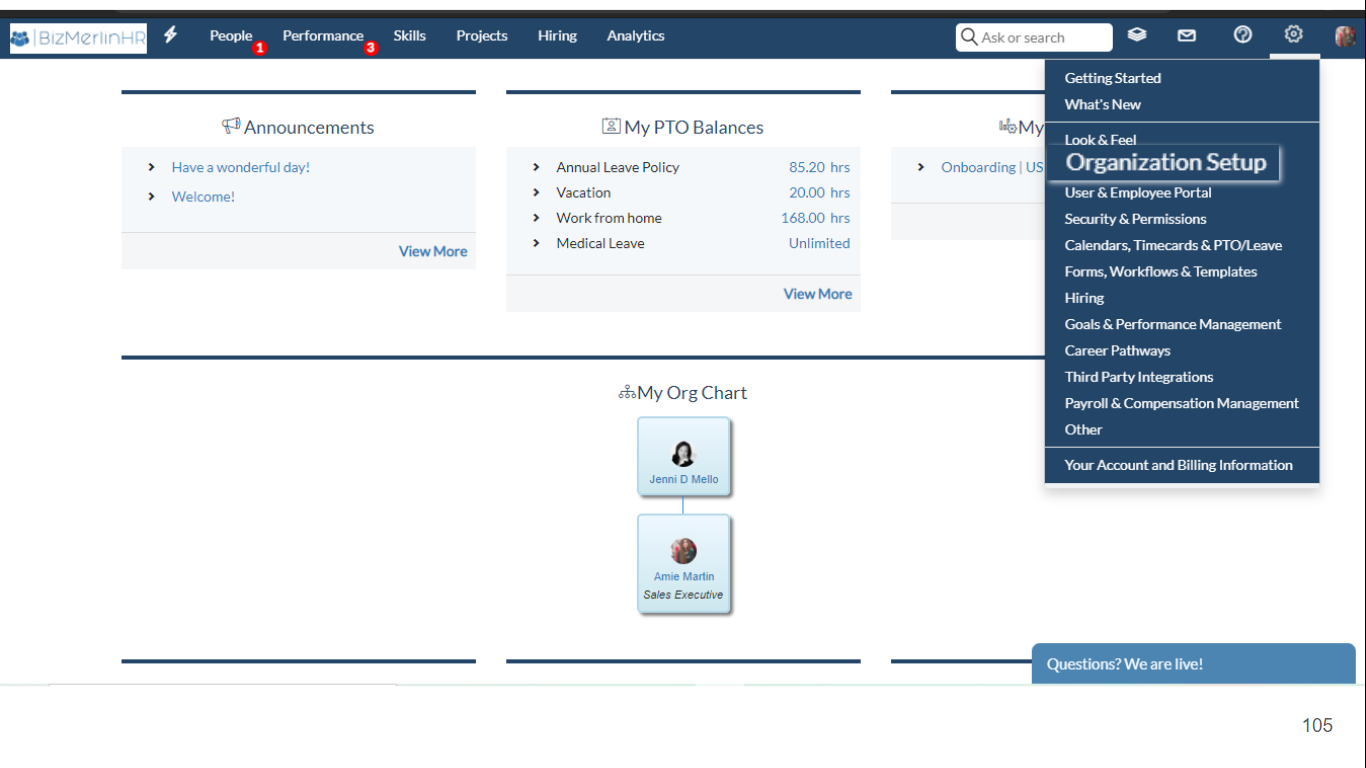
- Go to the top right “Setup” menu > “Organization Setup” sub-menu.
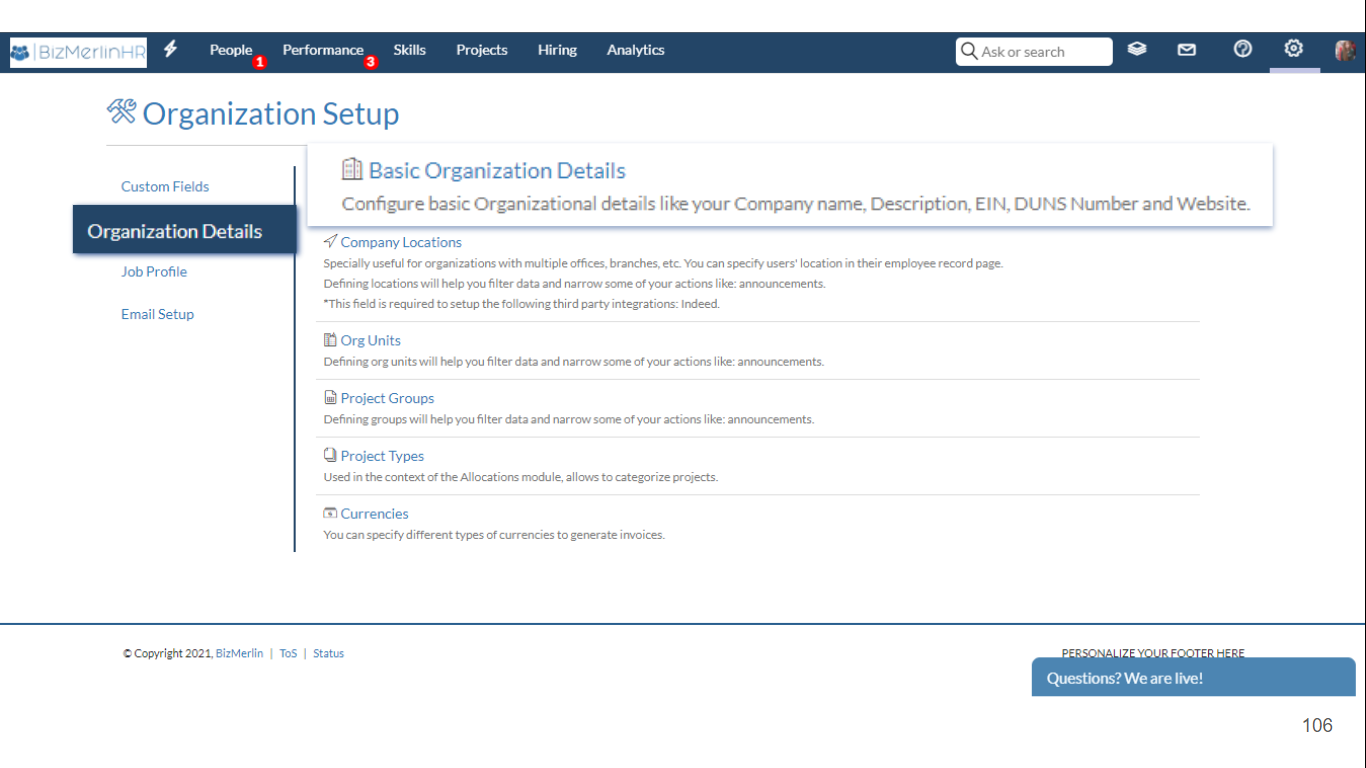
- Go to the Organization Details section and click on “Basic Organization Details”.
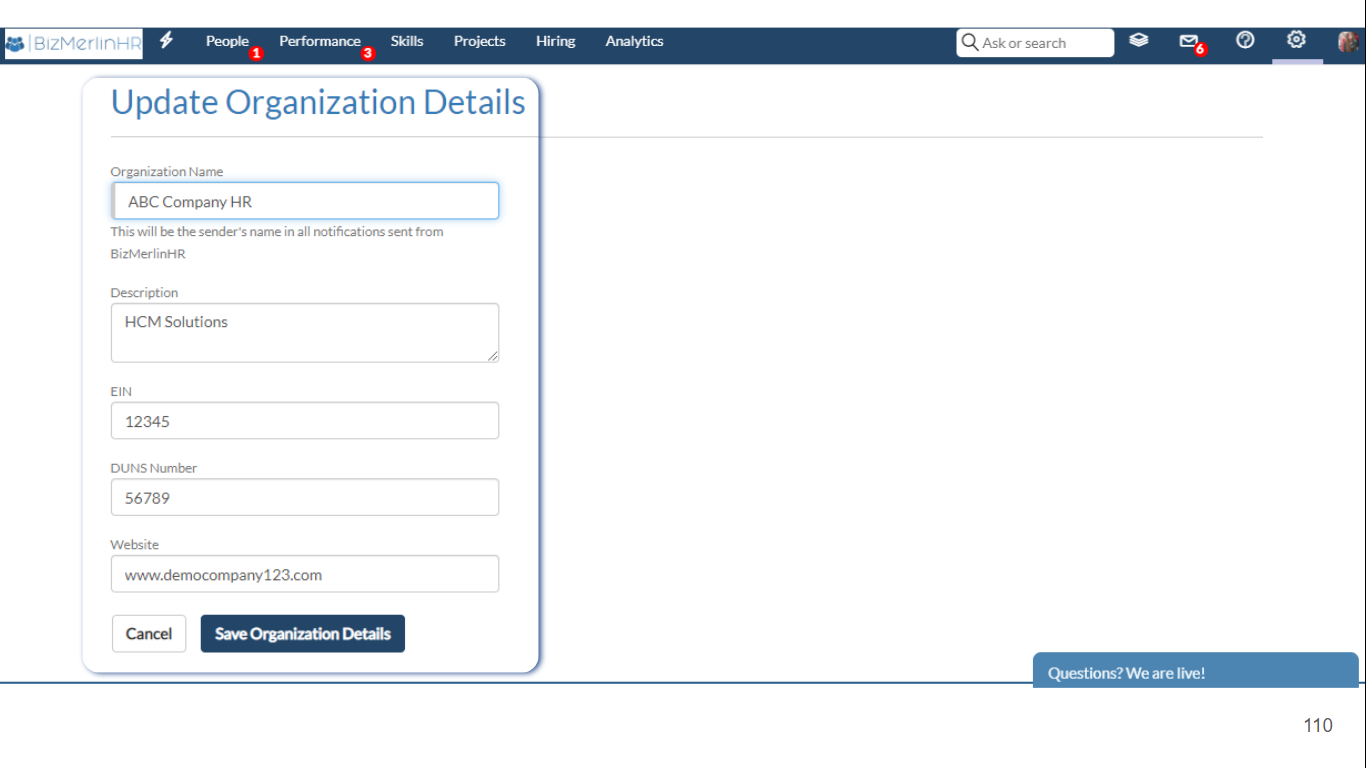
- To edit the organization name which is shown as a sender name in an email notification, click on the “Edit Organization Details” button.

- Update the organization name.
- Click on “Save Organization Details”.