MailChimp – ClayHR Integration
Please, follow the following steps to setup your ClayHR integration with MailChimp
Link ClayHR and MailChimp:
Step 1: Getting information from MailChimp:
- Getting API Key from MailChimp:
a. Sign into your MailChimp account and go to your profile.
b. Click on Extras tab, then select API keys.
c. Scroll to the bottom and click the Create A Key button to generate a new key or just highlight and copy an existing API key, which is a long string of characters.
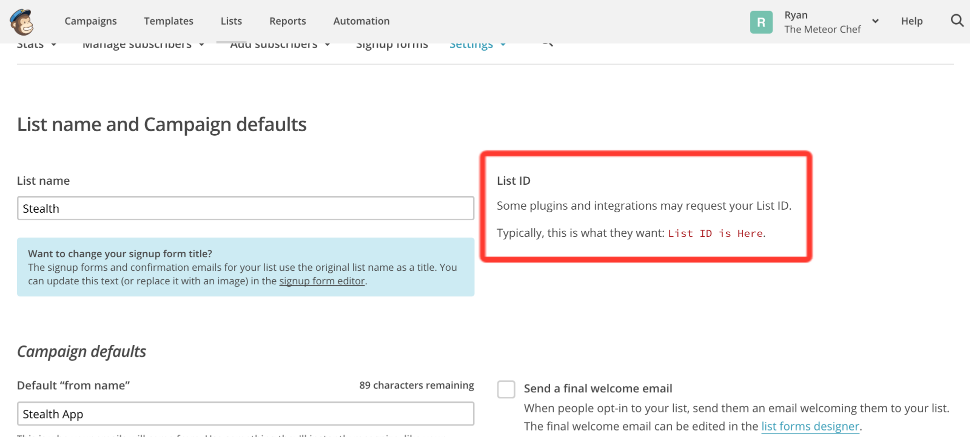
- Getting List-id from MailChimp:
a. Click “Lists” from the top menu to view your MailChimp lists.
b. Select the list you wish to offer user sign-up.
c. Click “Settings” and then “List name and defaults”.
d. Your list id will be at the top of the right column under List ID.
f. Copy your List-Id.

Step 2: Linking MailChimp in your ClayHR account:
- Go to the top right “Setup” menu and scroll down and click on “Third Party Integrations”: Setup-> Third Party Integrations
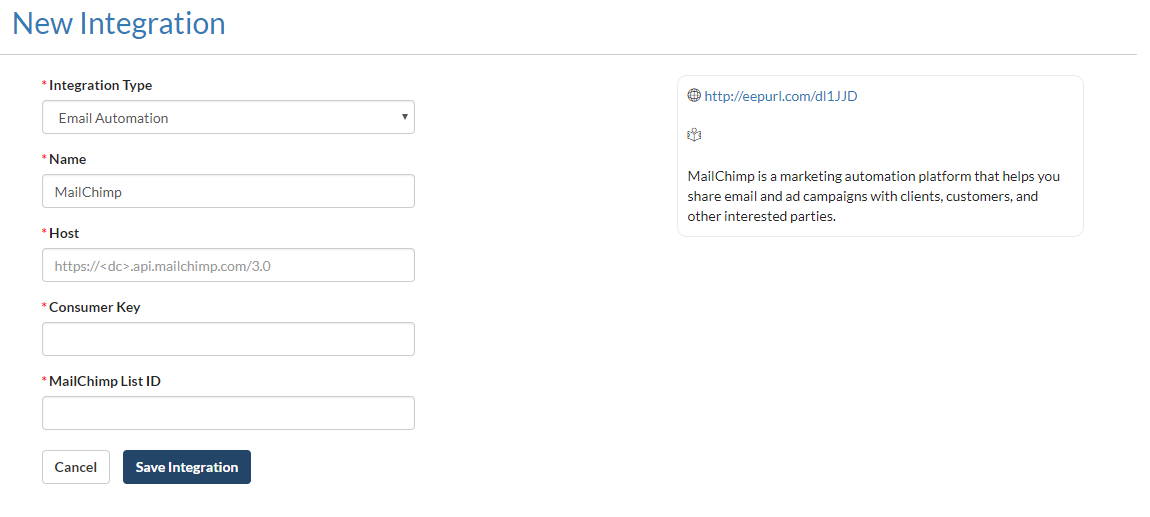
- On the Third Party Integrations page, click on the button “New Integration” and choose “Email Automation”, then MailChimp.
- Specify Base URL as “https://<dc>.api.mailchimp.com/3.0”, where dc is data center for your account.
- For example, if the last part of your MailChimp API key is us6, then fill Base URL as https://us6.api.mailchimp.com/3.0/.
- Fill Consumer key as API key that is taken from your MailChimp account.
- Fill MailChimp List ID.
- Hit “Save” button and you are done.

That’s it! Now, you are ready to integrate with MailChimp. Whenever a new user is created in ClayHR, it is automatically added to MailChimp list.


