
Integration with QuickBooks Desktop (Premier/Enterprise)
ClayHR’s integration with Quickbooks desktop provides the ability to push users from ClayHR to QuickBooks Desktop.
Step 1: QuickBooks Connection
To connect with QuickBooks account, navigate to Setup Menu -> Third Party Integrations.
Add a new integration, and choose “QuickBooks Desktop”.
- On the integration view page for QuickBooks Desktop, click on Download File link and download the QWC file to your machine.
- You will also be emailed a password.
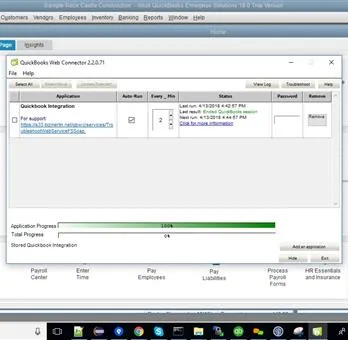
- Upload that downloaded QWC file in QuickBooks web connector. Add the password that you receive via email when prompted. Navigate to the toolbar, File -> Web Services, and a new window will appear.

In this new window, click on Add an application button and select your downloaded QWC file for authentication. After successful authentication, a status for “successful authentication” will appear in the Status column. Please fill the password in the password column which you have received in your e-mail.
Step 2: Specific Integrations
User Push (from ClayHR to QuickBooks Desktop)
- Go to the User Profile page, which you want to push to QuickBooks Desktop.
- On the User Profile page under the Admin tab, click on Push User to QuickBooks Desktop link.
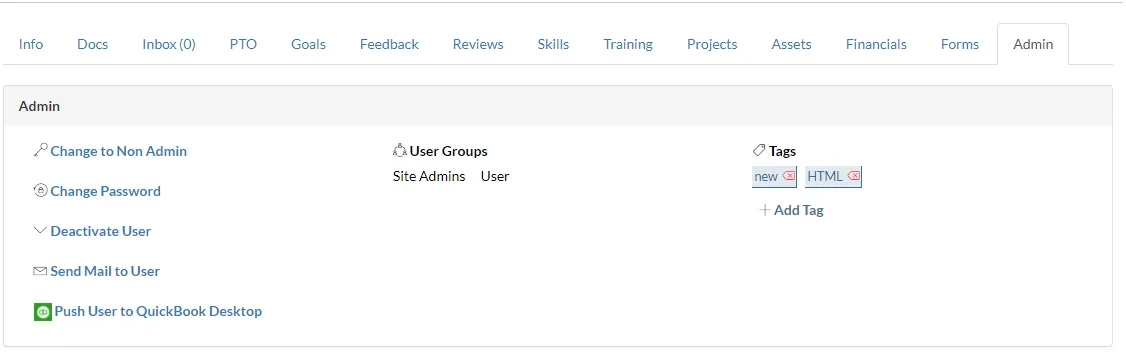
- After pushing the user to QuickBooks Desktop, the respective user will be created on it after a few minutes. The exact time depends on the QuickBooks web connector Every_Min column settings, which is generally set to two minutes.
- Also, “AutoRun” should be selected on the QuickBooks web connector for auto updation.
Access the Reports
You can access the integration logs via the Reports and on the 3rd Party Integrations page.


